Tinboard v0.12.0

Posted on 2024-04-18 16:46 +0100 in Coding • Tagged with Python, terminal, textual, YouTube • 2 min read

Tinboard has turned into a tool I use pretty much every day; it's probably my most-used Textual/Python-developed application at this point. This is causing me to think more and more about how I can add things to it that are related to the core purpose, but are also outside of the main "interface with Pinboard" thing.

A thing with keeping bookmarks for a long time is that some of them go stale, go away. Some will just plain 404, others the whole site will disappear. If I find myself going back to a bookmark and seeing this is the case, I'll hit the Wayback Machine and see if there's an archive there.

So I got to thinking: what if I add the ability to perform this check into Tinboard itself? So I did just that.

Now, in the application, if you press w with a bookmark highlighted, it will check with the Wayback Machine to see if the bookmark is in the archive. If it isn't you see this:

No archive result

On the other hand, if it is in the archive, you'll see something like this:

Is in the archive result

I sense this is going to be the first step in a couple of features related to this. I'm thinking that I may go on to add a "swap the URL for this bookmark with the Wayback Machine archive URL" feature, which will be handy for those bookmarks that have one away, and it would also be useful to look at the options for a "please archive a copy of this bookmark" feature.

But, for now, v0.12.0 is available and has this handy (for me anyway) first step.

Tinboard can be installed with pip or (ideally) pipx from PyPi. It can also be installed with Homebrew by tapping davep/homebrew and then installing tinboard:

$ brew tap davep/homebrew
$ brew install tinboard

The source is available on GitHub.


PISpy v0.6.0

Posted on 2024-04-17 11:30 +0100 in Coding • Tagged with Python, terminal, textual, YouTube • 1 min read

Back in the very early days of the Textual adventure, within the first month or so of working on the framework, we had a period of dogfooding. One of the projects I wrote during that time was a little tool I called PISpy.

The initial version was pretty much a quick hack; during that dogfooding period I did my best to try and develop a new project every couple of days. Since then I've let PISpy descend into bit rot.

In the last week or so I've turned my attention back to it and made an effort to tidy up the code, tidy it some more, and some more, and even some more.

This morning I put the finishing touches to these changes and released v0.6.0.

PISpy in action

PISpy can be installed with pip or (ideallty) pipx from PyPI. It can also be installed with Homebrew by tapping davep/homebrew and then installing pispy:

$ brew tap davep/homebrew
$ brew install pispy

The source is available on GitHub.


Tinboard v0.11.0

Posted on 2024-04-09 15:43 +0100 in Coding • Tagged with Python, terminal, textual, YouTube • 1 min read

While my time working on Textual might have come to an end, my time working with Textual hasn't. Three days back I experimented with Textual's newly-added "inline mode":

In doing so I extended the application so that it's possible to run tinboard add and quickly enter a new bookmark and then carry on in the terminal, without needing to "go fullscreen". I'll admit it's of limited use, but it seemed like a good shakedown of the feature and in working on it I was able to discover a couple of bugs (#4385, #4403).

The effect of this is this:

Tinboard inline addition in action

Tinboard can be installed with pip or (ideally) pipx from PyPi. It can also be installed with Homebrew by tapping davep/homebrew and then installing tinboard:

$ brew tap davep/homebrew
$ brew install tinboard

The source is available on GitHub.


I got a YouTube play button!

Posted on 2023-10-18 19:07 +0100 in Creative • Tagged with YouTube • 2 min read

According to YouTube I joined up on 2006-09-04. I don't think that's quite correct. I did have a Google Video account from very early on, and uploaded a couple of things, and it got ported to a YouTube account when Google discontinued the original video service and settled on YouTube post-purchase. So I guess, in some respects, it's kind of correct.

For most of that time I had hardly anything on there. Couple of videos to do with the weather station I ran for a few years, some things related to my photography, couple of things related to hacking with code; that's about it.

Then, a couple or so years back, when I got heavily into PCVR gaming, I started to record my gaming sessions and upload them.

As of the time of writing there are 1,109 videos in the PCVR playlist, and around 1,300 videos on my channel in total.

As for subscribers... eh, come on, few people are really interested in watching some old bloke stumble around in VR, and I was very late to the game anyway. But, apparently, around 350 lovely folk care enough about my nonsense to subscribe.

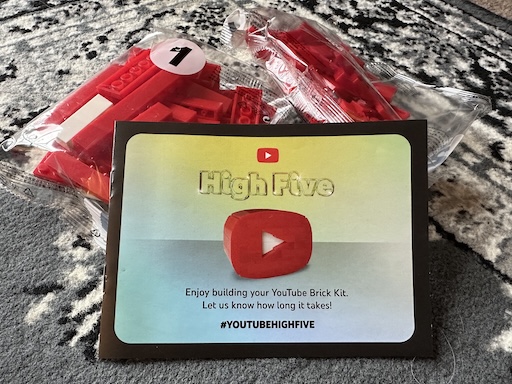
Nowhere near enough for a YouTube play button, that's for sure. Only... I now have a play button!

YouTube Lego Play Button

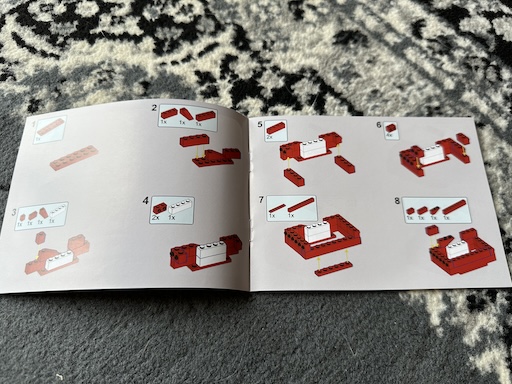
I mean, sure, I have to build it myself...

YouTube Lego Play Button

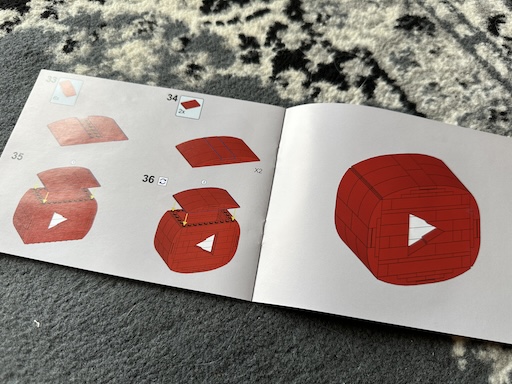
...but it's something to show for all my efforts, I guess. ;-)

YouTube Lego Play Button

As for how I got it: presumably anyone/everyone with a YouTube account with some content got the offer of goodies (I also got offered free coffee, sausage rolls, socks, and a bunch of other stuff I've forgotten), and I was lucky to claim one of these almost the instant the email turned up.

It's very likely the only YouTube play button I'll ever receive. I think it will take pride of place on my desk.


My VR recording setup

Posted on 2022-05-28 17:01 +0100 in Tech • Tagged with VR, YouTube, PCVR • 5 min read

Introduction

For well over a year now I've been recording my VR gameplay and uploading it to YouTube. Less as a "content creation" thing, more as a nice record of games I've played and, on occasion, as a little bit of help to others; in the past I've watched other folk play games I like to get ideas for approaches to them, and I've also received the odd comment now and again where my play-through has helped someone else.

A question I've had a couple of times is what I use to do the recording, so I thought I'd make an effort to write it all down here.

First up, a couple of things to note: I started recording PCVR around April 2021 and the initial setup was a bit trial-and-error and Google searching and blog reading. As such, not all of the details of how to set up will be here, and I may even miss off some stuff I changed and is worthy of note; at the same time I might mention stuff that's just an obvious default.

Consider this blog post as being a written version of one of my videos: it's for my own fun and benefit and might also help me in the future should I want to apply some of this again, and if it helps someone else that's a lovely bonus.

The Hardware

While it's not exactly the point of this post, I guess it's worth mentioning the hardware I use as of the time of writing. Given this is about PCVR, I of course have a PC which is running Windows. The machine information within Windows says it's a:

Intel(R) Core(TM) i5-10400F CPU @ 2.90GHz

Warning: I don't do hardware. I buy it from time to time, but hardware leaves me bored. It runs VR on a PC. This is fine.

The machine itself has 16 GB of memory, is running Windows 10 Home and has a GeForce RTX 3060 for handling the graphics.

The headset I'm using is a~~n Oculus~~ Meta Quest 2. I've had this since around November 2020, playing Quest-native games for the first few months, until I cracked and got the PC mentioned here to get into PCVR.

The headset is connected to the PC with a USB cable.

Finally, for recording voice, I use a USB lapel microphone with a really long cable.

It should be said that, yes, sometimes, I do get a little caught up in things with two cables hanging off me. If I could give one tip here it would be that running the microphone cable up your trousers and shirt makes life a ton easier. As a bonus I have the USB cable for the headset running around the headset's strap and connected to it at the back and then running down my back.

OBS Studio

The core software used is OBS Studio. This has got to be one of the best bits of free software I've ever used, in terms of interface and what it delivers.

Years back my son used to record and upload gameplay to YouTube and I can remember him having no end of issues using different recording software; some working with one game but not another, some other working with a different set of games, video and sync issues, etc... Lots of pain quite often. With OBS Studio the only issues I've ever had have been my own mistakes.

At this point I have to confess that when I set it up I didn't make a point of keeping a recording of what I changed -- I was experimenting and not expecting much to come of it. So what I note here are the things that feel like they're important, and only the things that relate to recording PCVR, not streaming it (that might end up being a different blog post).

That said, here are things I seem to remember as being key:

Output Settings

The items in the output pane in settings that I have and which might be important are:

  • Output Mode: Simple
  • Recording Quality: High Quality, Medium File Size
  • Recording format: mkv
  • Encoder: Hardware (NVENC)

I do remember the recording format being set to mkv as something that's really important. I think it's mp4 by default, or was when I first installed, and if your machine crashes or OBS were to crash or something, you could end up with footage that can't be used. Using mkv means you can still use the footage (as I understand it). It does mean that once you're finished you have to use the "remux" option under the File menu, but that's a small price to pay.

I can say that at least once I've had to hard-reboot my machine when a game and SteamVR and the like all got upset. I likely saved 45 minutes or more of footage thanks to mkv.

Video Settings

Nothing really special in here, I simply have both the base and output resolutions set to the desktop resolution. This might be something for me to tinker with in the future, but so far I've not run into any problems.

VR Capture

Now, of course, all of the above is great and fine and all but there's the issue of how you capture the VR gameplay. I approach this a couple of different ways. The first is I use the OpenVR Capture plugin for OBS. This makes capturing footage from SteamVR really easy. The only downside I found is that out of the box there's no default crop setting for using a Quest 2 (or I guess the Rift, as the Quest 2 sort of appears as a Rift to SteamVR games). As such I remember playing trial and error with that until I was happy I was getting as much footage as possible without having black bars and the like.

Something I also like about the OpenVR Capture plugin is you can say if you want to capture the left or right eye. Normally not that big a deal for some things, but if you're playing a shooter and want people to see exactly what your dominant eye is seeing, that matters.

Sadly, of course, not every game can be captured with that plugin. So far I've found that any game that can't be has its own mirror window on the desktop. In that case I use a Game Capture source and set it to capture that specific window. I could of course just get it to capture the focused window or something like that but I prefer to know that it's only grabbing what I want it to grab.

Conclusion

That's pretty much it I think. There's not a lot to it, although on occasion a lot can go wrong. Mostly it's a wonder any of it works. I mean, think about it, I have a computer with two screens strapped to my face, with two controllers in my hands talking to it; it's then connected via the Oculus Link to the Oculus Home; from which I start up SteamVR; and from the SteamVR home I start up the game and then "live" inside the game. It's a virtual world inside a virtual world inside a virtual world inside a real world; with lots of software along the way, all talking at once.

That is then being recorded.

Sometimes, on occasion, it takes a reboot or five to make it all work together.

Really, it's a wonder it ever works. ;-)