HomePod Stuck Installing Update

Posted on 2023-07-29 07:56 +0100 in Tech • Tagged with Apple • 2 min read

I have three HomePods. I have a Mini in the kitchen and one in the bedroom. I then have one of the newer-gen "big" HomePods in the living room, which amongst other things is the speaker for my Apple TV device (yeah, I'm kinda Apple all over the place these days).

This week there was an update to the software, updating to 16.6. The two Minis updated just fine. The big one, however, days later...

HomePod stuck installing the update

It's been like this all the time since the update turned up. I've tried a reboot from the Home app. I've tried pulling the plug and plugging it in again. Nope. It just keeps sitting there like this.

Meanwhile... it's working (more or less) fine. It's still playing music. It's still being the speaker for the Apple TV. It still answers most questions and performs most commands (most of the commands I give it are to add stuff to my Reminders).

On occasion if I ask it questions about other devices in the apartment ("hey siri, what's the temperature in the bedroom?") it'll do the "working on it" thing and then give up saying the thing wasn't responding. That seems to be about the worst of it.

Having checked this online it looks like, annoyingly, the one option I have left is to do a full reset, removing it from my Home, doing a factory reset, and then setting it up again. I'm sure it's something that'll take 10 minutes or so; but it's an annoyance.

Apple: #ItJustWorks.


Quiche Reader

Posted on 2023-07-27 08:42 +0100 in Tech • Tagged with software, reading, recommendation, iOS, macOS, iCloud • 2 min read

I can't quite remember where I found this this week, I think it might have been via a comment on some article on the orange site1, but I stumbled on a really handy bit of free (as in beer) software called Quiche Reader.

It's really simple and I feel exactly the sort of thing I need. Over the years I've tried all sorts of "save to read later" tools and systems; be it things like Pocket, or tools now built into the browser these days, even adding URLs to Remember the Milk (back when I used that) or (these days) Apple Reminders.

Nothing ever quite stuck. Normally I'd end up slapping stuff to read into these systems and then never reading them.

Quiche Reader, so far, feels like the perfect approach.

Quiche Reader in action

It's quite simple: if I see something I want to read a bit later I save it into the application (which will sync to my other devices via iCloud). Then, when I go to Quiche Reader, I have to read the article or delete it and move on. This is sort of what I'd do anyway, saving stuff up for months on end until one day I'd declare saved reading bankruptcy and then start the whole cycle again.

Now I can look at the saved article stack and I'm forced to either read the thing, or be honest with myself that if I'm not gonna read it now, I'm probably never going to.

It does have a "pause" facility (or something like that, I forget the name) where you can throw an article to the back of the queue; but even then that means it'll keep popping back to the top again.

I'll see how it goes; but so far I feel like this is the best "I'll save this to read later" tool I've found yet.


  1. I know, I KNOW! But there's so few places left to aimlessly scroll on the bus now! 


Failed successfully

Posted on 2022-06-03 09:05 +0100 in Tech • Tagged with UI, UX • 2 min read

A couple of days back (for vague values of "couple", of course), first of the month, having my morning coffee, I go and open my bank's mobile app to move a bit of money about and pay a couple of things. This happens every month. This is so routine I do it almost on autopilot.

Yeah, yeah, I know, it's banking, pay attention! But still... morning, coffee, routine.

I get to the final movement/payment and then notice something:

Useless error message

That.... that text! WTF? So then I look back at my payment history and notice that all but one payment hadn't gone through! O_o

This alone is fine. Stuff happens. Things fail. I'm okay with that. It's an inconvenience for sure but doubtless whatever the problem is will be fixed and I can make the payments again later. But...

That result. There's a tick. A GREEN tick. And a "Thank you". It's natural to see that image, know that it's always meant "shit worked" and just carry on.

In one of my systems at work there's a tool I wrote for checking a repository of code to make sure it conforms to a certain standard. When folk use it they get a night big, bold and bright green thumb-up above the text that says everything is cool. If there's a problem, any sort of problem at all, then the display is red and there's no jolly icon and it's obvious that things are different and you likely want to pay attention to the explanation of what isn't right.

This isn't news, of course. This isn't some revelation about UI design or anything. We know this stuff. I think what boggles my mind a little bit about this is that something as important -- and hopefully by this point as mature -- as a mobile banking app should get something as obvious as this right.

But here we are, with a nice friendly green icon showing a tick and a friendly big "Thank you" followed by smaller text going "aye shit didn't work pal".


My VR recording setup

Posted on 2022-05-28 17:01 +0100 in Tech • Tagged with VR, YouTube, PCVR • 5 min read

Introduction

For well over a year now I've been recording my VR gameplay and uploading it to YouTube. Less as a "content creation" thing, more as a nice record of games I've played and, on occasion, as a little bit of help to others; in the past I've watched other folk play games I like to get ideas for approaches to them, and I've also received the odd comment now and again where my play-through has helped someone else.

A question I've had a couple of times is what I use to do the recording, so I thought I'd make an effort to write it all down here.

First up, a couple of things to note: I started recording PCVR around April 2021 and the initial setup was a bit trial-and-error and Google searching and blog reading. As such, not all of the details of how to set up will be here, and I may even miss off some stuff I changed and is worthy of note; at the same time I might mention stuff that's just an obvious default.

Consider this blog post as being a written version of one of my videos: it's for my own fun and benefit and might also help me in the future should I want to apply some of this again, and if it helps someone else that's a lovely bonus.

The Hardware

While it's not exactly the point of this post, I guess it's worth mentioning the hardware I use as of the time of writing. Given this is about PCVR, I of course have a PC which is running Windows. The machine information within Windows says it's a:

Intel(R) Core(TM) i5-10400F CPU @ 2.90GHz

Warning: I don't do hardware. I buy it from time to time, but hardware leaves me bored. It runs VR on a PC. This is fine.

The machine itself has 16 GB of memory, is running Windows 10 Home and has a GeForce RTX 3060 for handling the graphics.

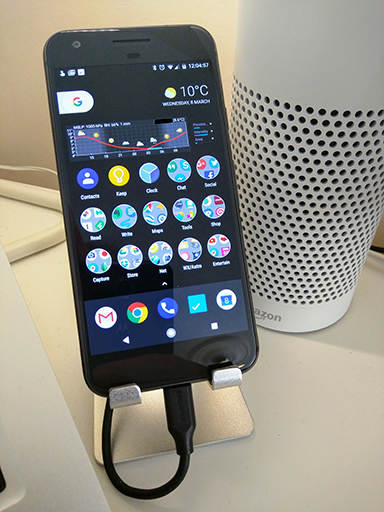
The headset I'm using is a~~n Oculus~~ Meta Quest 2. I've had this since around November 2020, playing Quest-native games for the first few months, until I cracked and got the PC mentioned here to get into PCVR.

The headset is connected to the PC with a USB cable.

Finally, for recording voice, I use a USB lapel microphone with a really long cable.

It should be said that, yes, sometimes, I do get a little caught up in things with two cables hanging off me. If I could give one tip here it would be that running the microphone cable up your trousers and shirt makes life a ton easier. As a bonus I have the USB cable for the headset running around the headset's strap and connected to it at the back and then running down my back.

OBS Studio

The core software used is OBS Studio. This has got to be one of the best bits of free software I've ever used, in terms of interface and what it delivers.

Years back my son used to record and upload gameplay to YouTube and I can remember him having no end of issues using different recording software; some working with one game but not another, some other working with a different set of games, video and sync issues, etc... Lots of pain quite often. With OBS Studio the only issues I've ever had have been my own mistakes.

At this point I have to confess that when I set it up I didn't make a point of keeping a recording of what I changed -- I was experimenting and not expecting much to come of it. So what I note here are the things that feel like they're important, and only the things that relate to recording PCVR, not streaming it (that might end up being a different blog post).

That said, here are things I seem to remember as being key:

Output Settings

The items in the output pane in settings that I have and which might be important are:

  • Output Mode: Simple
  • Recording Quality: High Quality, Medium File Size
  • Recording format: mkv
  • Encoder: Hardware (NVENC)

I do remember the recording format being set to mkv as something that's really important. I think it's mp4 by default, or was when I first installed, and if your machine crashes or OBS were to crash or something, you could end up with footage that can't be used. Using mkv means you can still use the footage (as I understand it). It does mean that once you're finished you have to use the "remux" option under the File menu, but that's a small price to pay.

I can say that at least once I've had to hard-reboot my machine when a game and SteamVR and the like all got upset. I likely saved 45 minutes or more of footage thanks to mkv.

Video Settings

Nothing really special in here, I simply have both the base and output resolutions set to the desktop resolution. This might be something for me to tinker with in the future, but so far I've not run into any problems.

VR Capture

Now, of course, all of the above is great and fine and all but there's the issue of how you capture the VR gameplay. I approach this a couple of different ways. The first is I use the OpenVR Capture plugin for OBS. This makes capturing footage from SteamVR really easy. The only downside I found is that out of the box there's no default crop setting for using a Quest 2 (or I guess the Rift, as the Quest 2 sort of appears as a Rift to SteamVR games). As such I remember playing trial and error with that until I was happy I was getting as much footage as possible without having black bars and the like.

Something I also like about the OpenVR Capture plugin is you can say if you want to capture the left or right eye. Normally not that big a deal for some things, but if you're playing a shooter and want people to see exactly what your dominant eye is seeing, that matters.

Sadly, of course, not every game can be captured with that plugin. So far I've found that any game that can't be has its own mirror window on the desktop. In that case I use a Game Capture source and set it to capture that specific window. I could of course just get it to capture the focused window or something like that but I prefer to know that it's only grabbing what I want it to grab.

Conclusion

That's pretty much it I think. There's not a lot to it, although on occasion a lot can go wrong. Mostly it's a wonder any of it works. I mean, think about it, I have a computer with two screens strapped to my face, with two controllers in my hands talking to it; it's then connected via the Oculus Link to the Oculus Home; from which I start up SteamVR; and from the SteamVR home I start up the game and then "live" inside the game. It's a virtual world inside a virtual world inside a virtual world inside a real world; with lots of software along the way, all talking at once.

That is then being recorded.

Sometimes, on occasion, it takes a reboot or five to make it all work together.

Really, it's a wonder it ever works. ;-)


Why I really like fish abbreviations

Posted on 2019-10-23 00:18 +0100 in Tech • Tagged with fish, shell • 4 min read

I'm filing this as a TIL because, while it wasn't T, I did L it very recently and it was a new trick that impacted on around 25 years if prior working practice.

I think it must have been around 1991 when I first encountered 4DOS. While I'd used the odd Unix shell here and there previously, it'd only been in passing. It was 4DOS that first introduced me to the power of aliases on the command line. Many of the aliases I set up and used in 4DOS still remain with me to this day, on GNU/Linux and macOS, in some form or another.

I'm sure I don't need to tell anyone reading this why aliases and cool and handy and pretty much vital if you do lots of work on the command line.

And then, a couple or so weeks ago, as a very recent convert to fish, I discovered the abbr command. At first glance it didn't seem to make much sense. It was like alias, only it expanded what you typed rather than acted as a command in its own right.

I did a bit of digging and some of it started to make sense. One thing that really won me over -- and while it's something that doesn't directly impact on me -- was the argument that it allows for a far more transparent command history; especially if you're likely to use a transcript of a shell session in a place where people might not know or have access to your aliases.

Imagine being in a position where you have loads of handy and cool aliases, but you also need to record what you've done so other people can follow your work (does it show that I sit amongst people who maintain lab notebooks?); it seems like it would be a bit of a bother needing to record all of the aliases in your own work environment up front. Without that information few people will be able to make sense of the recorded commands, with that information they'd still need to double-check what each command does.

So imagine an alias that, when used, expands in place. Then you'd get all of the benefit of aliases while also having a full and readable record of what you actually did.

Seems neat!

Here's a silly example. For a long time I've carried around an alias called greedy that runs something like this:

du -hs * | sort -rh

It's pretty straightforward: I'm using du to get a sense of which directories are using what space, and then using sort to make a worst-to-best-offender list out of it. So I could use an alias:

alias greedy="du -hs * | sort -rh"

The only downside to this is that, any time I run it, if I were to record the shell session and make it available for someone else to read, they'd just see:

~/develop$ greedy
1.1G    JavaScript
824M    C
699M    rust
 93M    python
 33M    fonts
 33M    elisp
3.4M    zsh
3.0M    misc
1.1M    bash
840K    ocaml
428K    C++
316K    lisp
172K    Swift
152K    git
132K    ruby
 28K    ObjC

Now, with an abbreviation rather than an alias, I'd type greedy but as soon as I hit Enter it'd get expanded to something anyone could read and follow:

~/develop$ du -hs * | sort -rh
1.1G    JavaScript
824M    C
699M    rust
 93M    python
 33M    fonts
 33M    elisp
3.4M    zsh
3.0M    misc
1.1M    bash
840K    ocaml
428K    C++
316K    lisp
172K    Swift
152K    git
132K    ruby
 28K    ObjC

This is far from the only benefit of abbreviations; for most people it probably isn't one of the most important ones, but I find it neat and compelling and this alone drove me to rework almost all of my aliases as abbreviations.

Having done that, I get other benefits too. For example, fish (like other shells) has good support for argument completion for well-known commands. The problem is, if you alias such a command, you don't get that completion. With an abbreviation though you do! All you need to do is type the abbreviation, hit space and it'll expand to the underlying command and then the full range of completion can happen.

There's also one last reason why I like abbreviations over aliases, and it's kind of a silly one, but in a good way. It's actually fun to see what you type magically expand as you do things, it makes you look like you can type even faster than you normally can! ;-)

PS: If you've never tried fish before and you're curious, it's easy to try in your browser.


I want to like Gboard

Posted on 2017-03-13 08:29 +0000 in Tech • Tagged with Google, Android • 3 min read

I want to like Gboard. On paper it looks really rather good. It's a keyboard from Google, it ties in with your account, it syncs things, it has clever searching for emoji and gifs and the like... what's not to like?

Problem is, I've been a user of SwiftKey since around 2011 (I think it was). I'm very used to how SwiftKey works and it also contains a lot of handy things. I like that it has smart completion, that it learns how I type a bit skewed and that it takes this into account, that I can turn off the fancy swipe typing and instead make use of handy gestures like swipe-left to delete a word. I like some of the themes a lot.

Into the mix comes my iPad, which I use on occasion. The standard Apple keyboard is horrible and, sadly, I find SwiftKey on iOS just as frustrating. It seems to lack enough key features there (especially the word deletion gesture, as far as I can tell) that it's also a bit annoying. My dream of a consistent typing experience across all devices just wasn't happening -- until I found Gboard on iOS.

That felt almost right. And from what I could tell it worked almost exactly the same on iOS and Android. So it felt like a good time to try and force myself to use Gboard on my Google Pixel and Nexus 7.

Sadly, though, I'm just not getting on with it. It's okay. It's not bad. It's just... not good. I'm finding that it lacks enough useful things that it's a frustrating experience. Little things like: when I enter Google Search, there's no word completion in the keyboard (SwiftKey has that); the word deletion gesture (swipe left from the backspace key) seems very hit-and-miss; the most obvious completion for a word sometimes appears in the middle slot but, other times, in the left slot. And so on.

Nothing huge. Nothing that's a show-stopper. But a handful of a little things that make me miss the comfortable home that is SwiftKey.

Don't get me wrong, it does have some very handy and cleaver features too. The searching for emoji -- including showing them up as word completions -- is rather clever. The gif-search thing is all kinds of fun too (mostly used to annoy the hell out of my son on twitter).

None of those quite make up for the bits I miss from SwiftKey though.

All that said, I've being making a point of pushing on with Gboard, thinking that most of my issues might just be because I'm too used to my "old home". Mostly this was working well, until I noticed something this morning. While reading the description for Gboard I noticed this handy thing in the "Pro Tips" section:

Sync your learned words across devices to improve suggestions (enable in Gboard Settings→ Dictionary → Sync learned words).

Useful! I'd assumed that this was the case anyway -- it's Google after all -- but it's good to know I can ensure it's turned on. So I went to turn it on. This is what I found:

Gboard WTF

What the hell Google? Sure, I do have a Gsuite account on my phone -- as in various apps have access to a Gsuite account (Gmail, Drive, etc...) -- but it's not the primary account on my phone and it's not the account I'd really want to be doing the dictionary sync with anyway. If I've got dictionary sync I want it tied to the keyboard no matter the app I'm in, and no matter the account I'm using in that app. I want the keyboard to be tied to a specific account when it comes to sync (just like SwiftKey does it).

This, I think, is a show-stopper for me.

I can overlook the other niggles, I can learn to cope with it not being quite so perfect in some situations; but the blanket inability to do something as simple as cloud-sync the predictions and learn from how I type -- things that are, these days, central to what Google's about -- it's frankly stupid.

I guess I'm going to have to keep Gboard as a backup keyboard for those times when I need to find the perfect gif.

Google WTF


Google Now Achievements?

Posted on 2017-03-12 12:16 +0000 in Tech • Tagged with Google • 1 min read

Over the past couple or so weeks I've been having some issues with Google Now. It first seemed to start on my Nexus 7, then appeared on my Nexus 6. More recently, even as of today, I've seen it on my Google Pixel. The problem is that, in the Google Now launcher (or on the Pixel, in the Pixel launcher), the Google Now page (that you swipe to the left for) sits empty for ages. All I see is the little animated waiting circle and nothing else. Once or twice I've had the Google app die and restart or, more often than not, after quite some time it finally loads up.

The latter happened a little earlier and I noticed something I'd not seen before:

Blank Google Now

What's with that "Achievements" menu option? You'll notice that the whole of the menu is blank -- no profile picture or anything and none of the menu options seemed to work.

Eventually, after I'd left it for a while, it ended up working.

Google Now finally working

And, once this happened, no "Achievements" option.

Presumably this is some back-end server issue, I'm being served up something I'm not supposed to be seeing and it's confusing the client app. Okay, I don't know that's the case, but it has that sort of feel.

So now I need to go looking for what this Achievements thing is all about.

Using Google, obviously.


Hello Google Pixel

Posted on 2017-03-08 12:22 +0000 in Tech • Tagged with Google, Android, Phone • 3 min read

For the past two years I've, mostly, being happily using a Google Nexus 6 as my phone. In the past six months or so I've started to notice that it hasn't been quite as good as it was. The main problem, for me, was that the camera was starting to play out. The issues were the ones that I've seen reported elsewhere: use of the camera would quickly make the phone laggy, very slow response times on pressing the shutter, occasional failure to save an image, etc. This was generally frustrating and, even more so, because I'd got back into photoblogging.

Meanwhile... I've been lusting over the Google Pixel ever since it was originally shown off. I was some way off my phone contract renewal and the price of a new Pixel was something I just couldn't justify. Last week though an offer cropped up that meant I could renew early and get a Pixel (including a free Daydream headset thrown in).

Fast forward to Monday just gone and...

My new Pixel

So far I'm liking it rather a lot. It is odd that it's smaller in my hand than the Nexus 6 was (the XL wasn't an available option and I was also starting to think it was time to drop down in size a little again) but I'm also finding it a little easier to work with; it's also nice that it fits in trouser pockets as well as jacket pockets.

It feels very fast (although every Android phone and tablet I've ever had have felt fast to start with) and smooth to use. I especially like the default feedback vibration -- it's a lot smoother yet also more reassuring than any I've felt before.

The Google Assistant is proving to be very handy. I'm sort of used to it anyway thanks to having owned an Android Wear watch for a couple of years but having it on the phone like this seems like a natural next step.

Another thing I'm getting very used to very quickly, and really liking a lot, is fingerprint recognition. I didn't think I needed it but now I'm wondering how I ever managed without it. Combined with the notification pull-down gesture that the recognition area supports it seems like a perfect way to open the get going with a phone.

There's a couple of niggles with it, of course. The main one for me is the lack of wireless charging. That was something I really liked about the Nexus 6: I could be sat at my desk and have the phone sat on top of a charging pad, staying topped up. No such handy setup with the Pixel. The other thing is the lack of water resistance. To be fair: it's not something I've ever really felt I needed with other phones and I'm not in the habit of sticking them under water; but knowing that it doesn't matter too much if it gets exposed to rain would be nice.

Other than that... there's not much else to say right now. It works and works well, the move from the N6 to it was pretty smooth and the Pixel has fallen perfectly into my normal routine.


A bit of a backlog at the Apple store

Posted on 2016-11-03 13:45 +0000 in Tech • Tagged with Apple, iMac, OS X • 2 min read

Over the past couple or so weeks my Macbook air has started to develop a minor, but irritating, hardware problem. Simply put, the left shift key fails now and again. I can press it and it does nothing. It's irritating because it messes with the flow of typing (especially when writing code) and the key also feels like it's sticking or clicking in a way that's different from all the other keys.

Macbook Keyboard

Given that I pass through Edinburgh on a pretty regular basis I thought I'd drop in and have a quick chat with someone about it. While I didn't expect a fix there and then (although finding out it was a trivial issue would have been nice) I was hoping someone could take a quick look and let me know what might be going on.

So, this morning, on the way to Waverley Station, I dropped in to the Apple store on Princes Street.

I walked in and looked for a member of staff, all seemed to be busy to start with but one soon noticed that I looked a little lost and asked me if they could help. I explained the issue and she said I needed to pop upstairs to chat with the staff up there.

So far so good.

So, I headed up to the first floor and caught the attention of another member of staff. Having explained the exact same thing to them I was told I needed to speak with yet another staff member. The chap I needed to speak to had a queue (yes, a physical queue of people) waiting to speak to him.

I joined the queue.

About five minutes later I got to speak with him. I, again, explained the problem and was told that looking at it would be no problem and they could do so at around 4pm. This was at about 10am. Having gone through 3 people and spent 10 minutes doing so I found out that there was a six hour queue to have someone actually take a quick look at the issue.

By that time I wouldn't even be in the same country, let alone the same city. So I had to say thanks but no thanks.

So now it looks like I have to make an appointment for some point in the future and make a special trip into Edinburgh just so someone can check out a sticky key on my Macbook.

Remind me again how the nice thing with Apple gear is that it "just works"...


Evernote's confusing menu

Posted on 2016-10-31 11:38 +0000 in Tech • Tagged with Evernote, coding • 2 min read

The other day I stumbled on a tip about Evernote. It was a snippet of information in a bigger post on the Evernote blog so I saved it to Evernote (obviously) to take a look at later.

The tip was that Ctrl-Cmd-B in Evernote (on the Mac) will format a body of text as source code. While I'm not in the habit of using Evernote to store code, not even snippets of code (that's something far better served by Gist), it seemed like something worth committing to memory.

This morning, while finally in front of a suitable machine, I took a look. Sure enough, there's the menu option.

Code formatting menu option

Handy! So I created a test note with some code in it so that I could see how it formatted it. I was curious to see if it just did simple fixed text or if it offered options to highlight various languages (I didn't hold out much hope for the latter, but it was worth a look).

That's when it got odd.

After I created a note and went to format some code, the menu option disappeared!

Lack of code formatting menu option

From what I can tell, once it's gone, there's no way to get it back. At least, not until you actually close down Evernote and start it up again.

Frustratingly, none of this is the case in the Windows version. While the key combination is different there, the menu option is available and stays available.

The version of Evernote I have (on my iMac and my Macbook) is 6.9.2. The version number on Windows is 6.4.2 (after checking for updates -- I'm going to guess that the Mac and Windows version numbers don't match on purpose).

Goodness knows what's going on here. All I can imagine is that it has something to do with a thread I found on Evernote's support forum that suggests that code block formatting is some sort of test/beta feature and can only be enabled via a settings option that isn't available via the version downloaded from the Apple App Store.

So, at some point, I guess I'm going to have to uninstall Evernote from the Macbook and the iMac, reinstall from the Evernote website itself, and try this again. All of which seems a bit silly when the menu option is there and visible when I run Evernote up!


Edit to add: Sure enough, removing the App Store version and installing the version from Evernote's own website, and then going into preferences and enabling the option, sorted it. It's still really odd they'd promote the facility via the blog and not mention it, and also very odd that the option would always show until the first time you're in a position to use it, and then it'd disappear.